
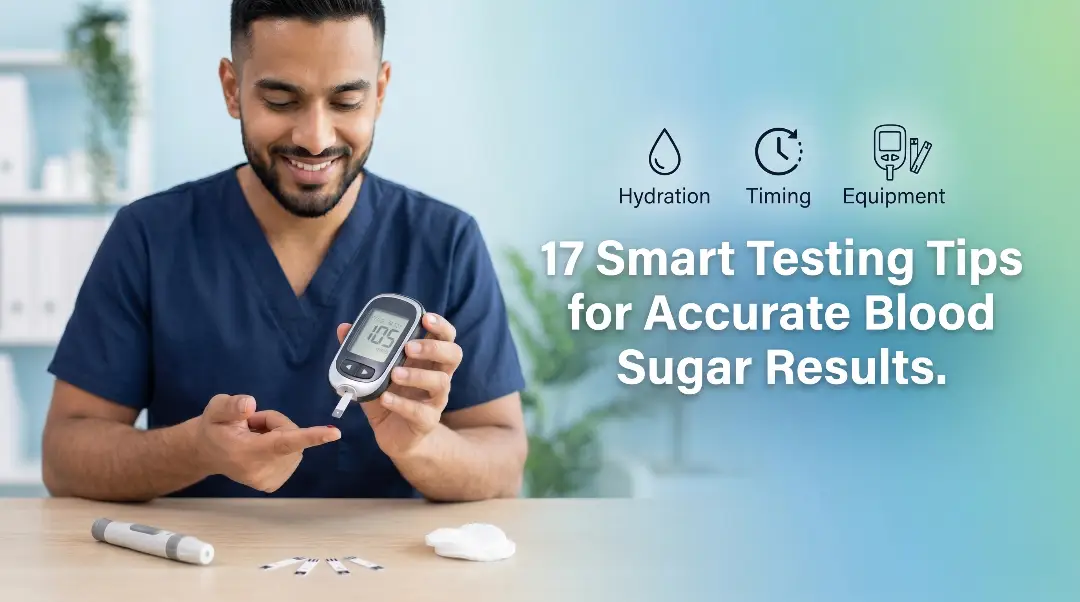
17 Smart Testing Tips for Accurate Blood Sugar Results That You Can Actually Trust
17 Smart Testing Tips for Accurate Blood Sugar Results is not just a catchy phrase. It is a guide that can genuinely change the way you manage your health. If you are living with diabetes or prediabetes, you already know how much your blood sugar numbers matter. But here is something that often gets overlooked: the accuracy of those numbers depends just as much on how you test as it does on the meter you use.
Blood glucose monitoring is one of the most important daily habits for people managing diabetes. Yet a surprising number of people do not get consistently reliable readings because of small but significant mistakes that creep into their routine. A reading that is off by even a modest margin can lead to the wrong food choices, incorrect insulin doses, or unnecessary anxiety.
This guide covers everything you need to know to make sure every single reading you take is as accurate as possible. Whether you have been testing for decades or you just picked up your first glucometer, there is something in here for you. Think of these tips not as rules to follow rigidly but as good habits that protect the quality of information you are gathering about your own body every single day.
What You Will Find in This Guide
- Wash Your Hands First
- Check Your Test Strip Expiry
- Store Strips Correctly
- Calibrate Your Meter Regularly
- Use the Right Amount of Blood
- Avoid Cold Fingers
- Rotate Lancing Sites
- Wait After Eating
- Test at Consistent Times
- Keep a Testing Log
- Avoid Testing Through Gloves
- Consider Altitude and Humidity
- Know Your Meter’s Limitations
- Compare With Lab Results
- Handle Emotional Stress Carefully
- Understand Hematocrit Effects
- Speak With Your Healthcare Provider Regularly
The 17 Smart Testing Tips for Accurate Blood Sugar Results
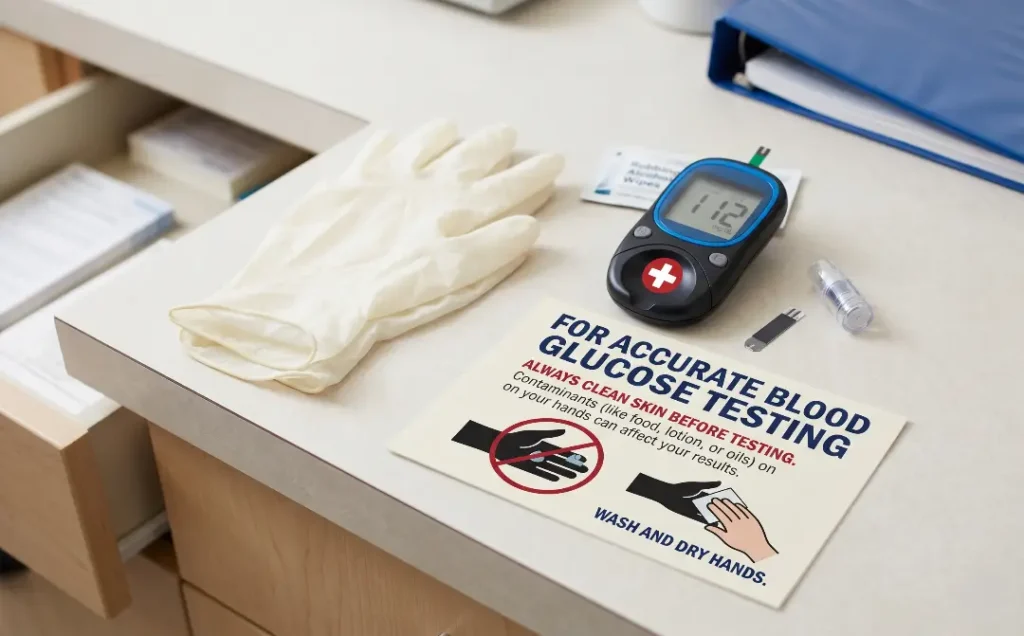
Tip 1: Always Wash Your Hands Before Testing
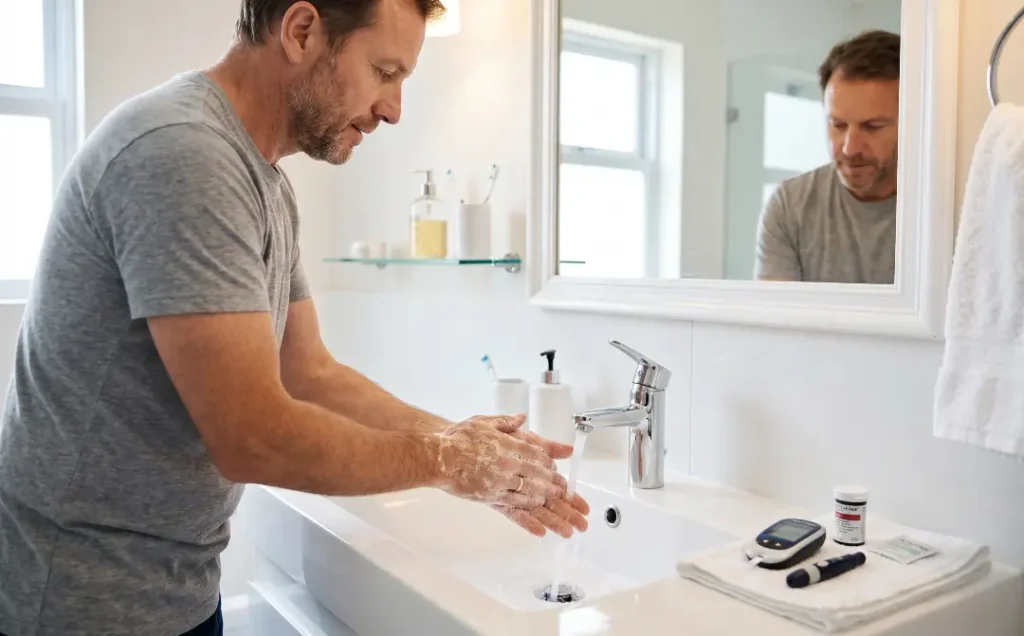
This is the single most impactful habit you can build, and it is also the one that people skip most often. Your hands come into contact with food, surfaces, and countless other substances throughout the day, and any residue on your fingertip can dramatically affect your reading. Even something as harmless as eating a piece of fruit and then testing a few minutes later without washing your hands can push your reading significantly higher than it actually is.
The key is to use plain soap and warm water, then dry your hands completely. Alcohol wipes are a common alternative, but they can interfere with results if the alcohol has not fully evaporated before you prick your finger. Warm water is especially important because it also improves circulation to your fingertips, which makes it easier to get a clean blood sample without having to squeeze excessively.
If you are out and running short on supplies, using the second or third drop of blood rather than the first can help reduce contamination from residue on the skin. This is a commonly taught technique in clinical settings and works reasonably well in a pinch, though proper handwashing remains the gold standard every single time you test.
Quick Tip: If soap and water are not available, wipe your fingertip with an alcohol swab and wait at least 30 seconds for the alcohol to fully evaporate before pricking.
Tip 2: Check Your Test Strip Expiration Date Every Time
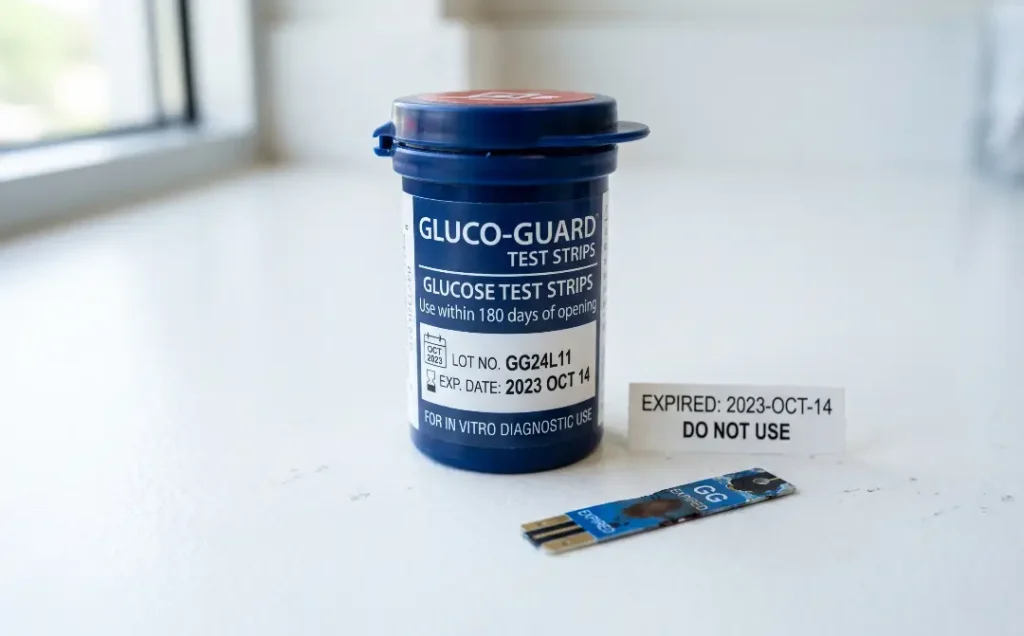
Expired test strips are one of the most common yet completely avoidable sources of testing errors. The chemical coating on glucose test strips degrades over time, which means the enzymatic reaction that detects glucose in your blood becomes unreliable after the expiry date. This degradation can cause your meter to display readings that are either falsely high or falsely low with no obvious indication that anything is wrong.
The expiration date printed on the test strip container is the date by which the strips should be used if the container has never been opened. Once you open the container, however, the timeline can change depending on the brand. Some strips remain viable for 90 days after opening regardless of the printed date, while others may degrade faster once exposed to air and humidity. Always check the packaging insert for your specific brand to know the correct usage window after opening.
Buying test strips in bulk can seem economical, but if you end up with more strips than you use before they expire, you are essentially wasting money and risking inaccurate readings. It is smarter to purchase quantities that align with your actual testing frequency, and to write the date you opened each container directly on the label with a permanent marker as a helpful reminder.
Important: Write the date you opened your strip container on the label. Many brands have a shorter use window after opening than the printed expiry date suggests.
Tip 3: Store Your Test Strips the Right Way

You might have perfectly good, within-date test strips, but if they have been stored poorly, the results they produce will be unreliable. Test strips are sensitive to temperature, humidity, and light. Most manufacturers recommend storing strips at room temperature between 15 and 30 degrees Celsius. Storing them in a bathroom cabinet seems convenient, but bathrooms experience regular spikes in heat and moisture from showers, which can compromise the chemical integrity of the strips faster than you might expect.
Equally problematic is leaving strips in a hot car, near a sunny window, or in a room that gets particularly cold in winter. Extreme temperatures in either direction alter the enzymatic reaction that your meter depends on to calculate glucose concentration. The glove compartment of a car is one of the worst places to store your testing kit, despite how practical it may seem for people who test on the go.
The best storage spot is somewhere cool, dry, and dark, such as a bedroom drawer or a dedicated spot in your kitchen away from the stove and dishwasher. Always keep the strips in their original sealed container and close the cap tightly after each use. Some strips come in individual foil wrappers, which provides extra protection against environmental factors and gives you more flexibility in where you store your kit.
Tip 4: Calibrate Your Meter With Control Solution Tests
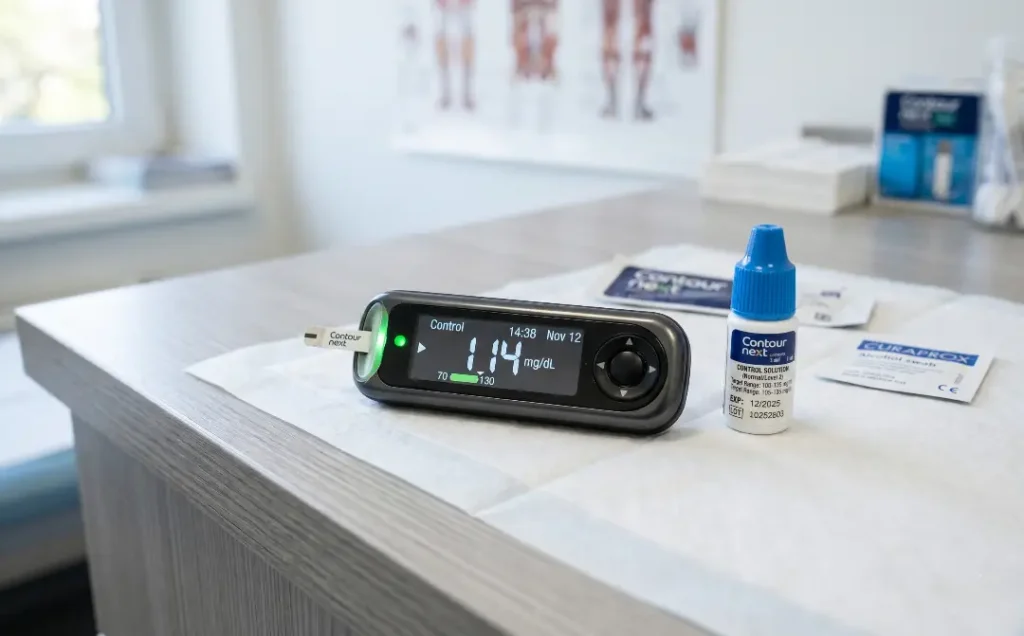
Control solution testing is a practice that many home users are completely unaware of, yet it is standard procedure in clinical settings for a very good reason. Control solution is a liquid that contains a known, fixed concentration of glucose. When you test it with your meter and strips, the reading should fall within a specific range printed on the test strip container. If it does not, that is a clear signal that your strips, your meter, or both are not functioning accurately.
You should run a control solution test whenever you open a new container of test strips, when you drop or suspect your meter has been damaged, when you have stored strips in conditions that may have exposed them to extreme temperature or humidity, and if your readings seem inconsistent with how you are actually feeling. Control solution has its own expiration date, so check that before using it, and note that once opened it typically expires within three months.
This extra step takes less than two minutes and can give you a solid baseline of confidence in your equipment. Consistently skipping it means you are trusting your health decisions to hardware and supplies that may be drifting from accuracy without any warning. Think of control solution testing the same way you would think about checking a thermometer against ice water, it is simply how you verify that your tool is telling you the truth.
When to Calibrate: New strips, dropped meter, unusual readings, extreme temperature exposure, or after the control solution bottle has been open for 3 months.
Tip 5: Use the Right Amount of Blood for Each Test
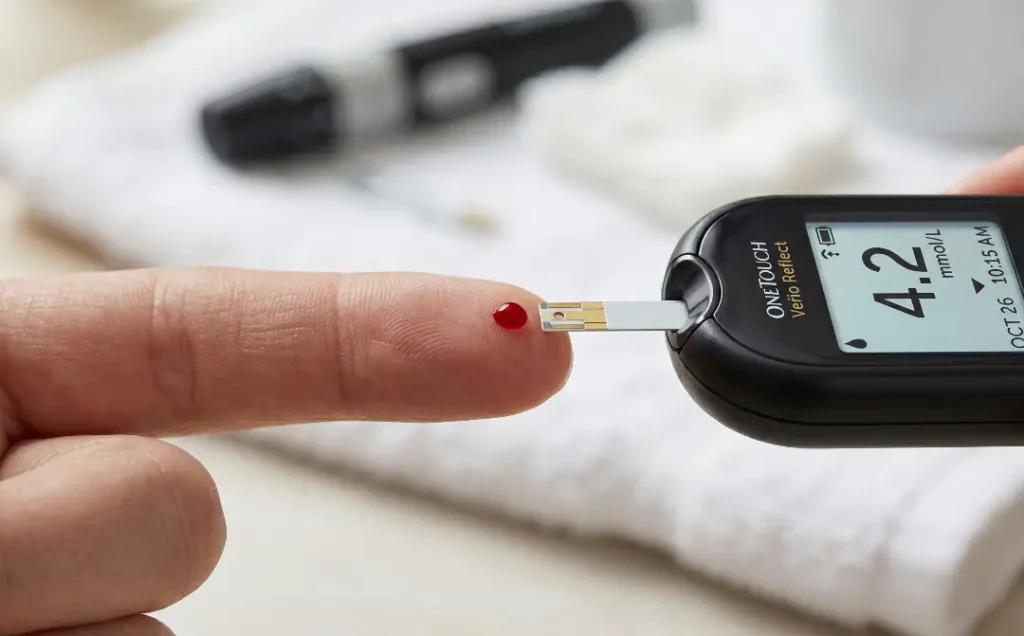
Modern glucometers require a remarkably small blood sample, usually between 0.5 and 1 microliter, which is about the size of a very small pinhead. Despite how tiny this is, both too little and too much blood can cause problems. Too little blood can trigger an error code or produce a falsely low reading because the sensor strip does not have enough sample to complete the electrochemical reaction reliably.
On the other hand, over-squeezing your finger to force out a large drop introduces tissue fluid along with the blood. This dilutes the sample and typically leads to a falsely low reading. The goal is a clean, free-flowing drop that comes from a well-lanced, well-circulated fingertip, not one that has been squeezed hard from the base to the tip like toothpaste from a tube.
The best approach is a gentle milking motion, applying light pressure at the base of the finger and allowing the drop to form naturally. If you are struggling to get a good drop, try warming your hands under warm water, doing a few seconds of gentle hand exercise, or letting your arm hang down briefly to allow blood to pool naturally in the fingers. Getting the right sample size is a skill that improves quickly with practice, and once you have it, testing becomes far more consistent.
Tip 6: Warm Up Cold Fingers Before You Lance
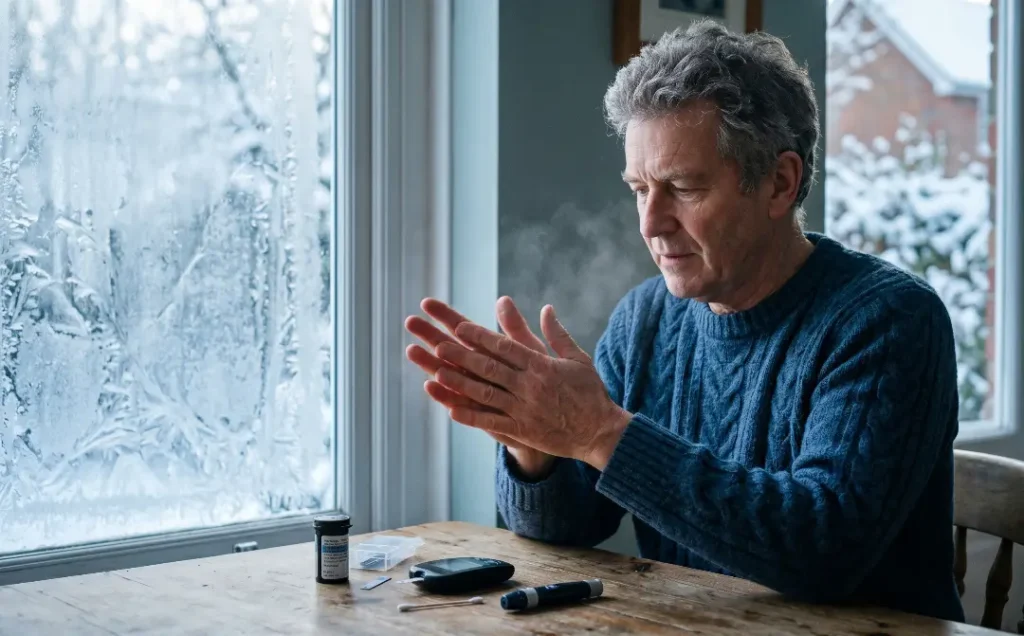
Cold fingers are a surprisingly common source of testing difficulty, and they affect accuracy in two distinct ways. First, reduced circulation to cold fingers means less blood near the surface, making it harder to produce an adequate drop. This leads to excessive squeezing, which as mentioned above introduces tissue fluid and skews the result. Second, vasoconstriction in cold conditions can cause some meters to produce readings that do not reflect the true glucose concentration in the broader circulatory system.
If you live in a cold climate, test in an air-conditioned room, or test first thing in the morning before your body has fully warmed up, you are likely experiencing this issue more often than you realize. The fix is simple. Before testing, warm your hands under warm running water for 30 to 60 seconds, rub them together vigorously, or wrap them around a warm cup for a minute or two until the fingertips feel noticeably warmer to the touch.
Some people keep a small hand warmer in their testing kit for situations where warm water is not available, which is a practical solution for testing at work, outdoors, or while travelling in cold weather. The investment is minimal and the improvement in both sample quality and testing comfort makes it well worth it for anyone who tests regularly in cooler conditions.
Cold Weather Tip: Store your glucometer in an inner pocket close to your body when going outdoors in winter. Meters work best at temperatures between 10 and 40 degrees Celsius.
Tip 7: Rotate Your Lancing Sites to Maintain Accuracy
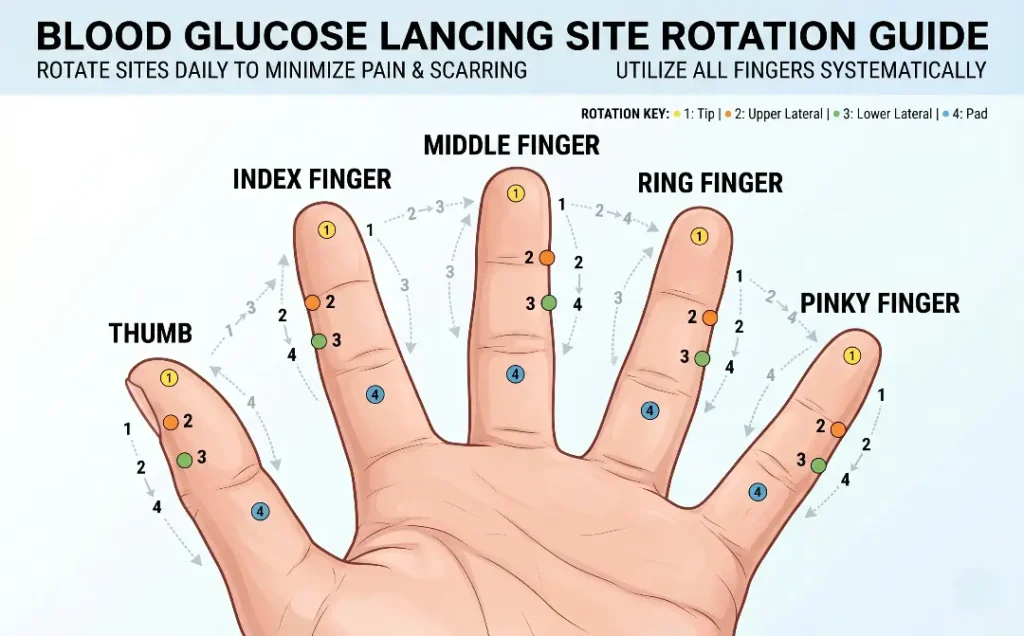
When you repeatedly prick the same spot on the same finger, the skin in that area thickens and forms calluses as a natural protective response. This thickening makes it harder to get a good blood sample, which in turn tempts you to either press harder or squeeze more aggressively. Both of these responses compromise sample quality and testing accuracy. The solution is systematic rotation across multiple sites so that no single location is used too frequently.
Most guidelines recommend using the sides of the fingertips rather than the pads, because the sides are less sensitive and have good capillary access. All fingers are usable, though many people prefer the middle three fingers of each hand. Using both hands and rotating systematically through multiple finger positions gives you roughly 10 to 20 distinct sites to cycle through, which is usually more than enough to prevent any one spot from becoming overly callused.
Some meters and lancing devices also support alternate site testing, which allows you to draw blood from the palm, forearm, or upper arm instead of the fingertips. These alternate sites are generally less painful for routine testing, but it is important to know that they can lag behind fingertip readings by 10 to 20 minutes during periods of rapid glucose change, such as right after a meal or during exercise. Stick with fingertip testing when timing precision matters most.
Tip 8: Wait Long Enough After Eating Before Testing Postprandial Levels
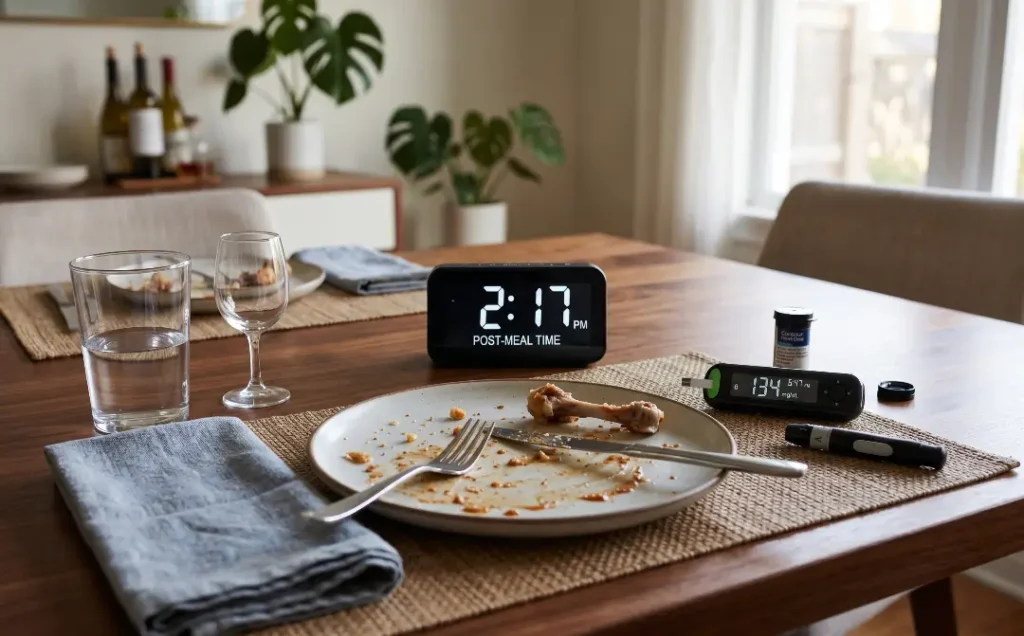
Postprandial blood sugar, meaning the blood sugar level after a meal, is an important clinical marker that tells you how your body processes glucose from the food you have eaten. However, the timing of when you test after a meal makes an enormous difference in what the number actually means. Testing too soon after eating gives you a reading that reflects glucose still being absorbed from your digestive system, which is typically higher than the true postprandial peak.
Most clinical guidelines recommend testing one to two hours after the first bite of a meal to capture the postprandial peak accurately. The exact recommended window may vary depending on your healthcare provider’s guidance and whether you are managing Type 1 or Type 2 diabetes. What matters most is consistency: if you always test at the same interval after meals, your readings become meaningful and comparable over time.
The composition of your meal also affects how quickly glucose peaks. High fiber, high fat, or high protein meals slow gastric emptying and delay the glucose peak, sometimes pushing it beyond the two-hour window. This is one reason why two people eating the same food can have different postprandial curves. Understanding this variability helps you interpret your own patterns rather than trying to match your numbers against a generic standard that may not account for your individual metabolism.
Standard Timing: Test fasting blood sugar before eating. Test postprandial levels one to two hours after the first bite of your meal.
Tip 9: Test at Consistent Times Each Day for Comparable Data

One of the most underappreciated aspects of blood glucose monitoring is that the value of your readings comes not just from individual numbers but from patterns over time. A reading of 130 mg/dL means very different things depending on whether it is fasting, two hours after a meal, mid-afternoon, or at bedtime. This is why testing at consistent, predictable times is so important for generating data that is genuinely useful to you and your healthcare team.
Structured testing schedules vary depending on your treatment plan. Someone managing with diet and exercise alone might test once in the morning and once after a main meal. Someone on insulin might test four or more times daily at carefully timed intervals. Whatever your schedule, sticking to it closely day after day means that when you spot a trend in your log, you can trust that the trend is real and not just an artifact of testing at different times of day.
Using phone alarms or reminders is an effective way to anchor your testing routine to specific times. Many people also tie their testing to existing daily habits, such as testing immediately upon waking before getting out of bed, or testing while waiting for the kettle to boil. These habit stacks reduce the mental load of remembering to test and make it much easier to maintain consistency across busy or disrupted days.
Tip 10: Keep a Detailed Testing Log and Review It Regularly
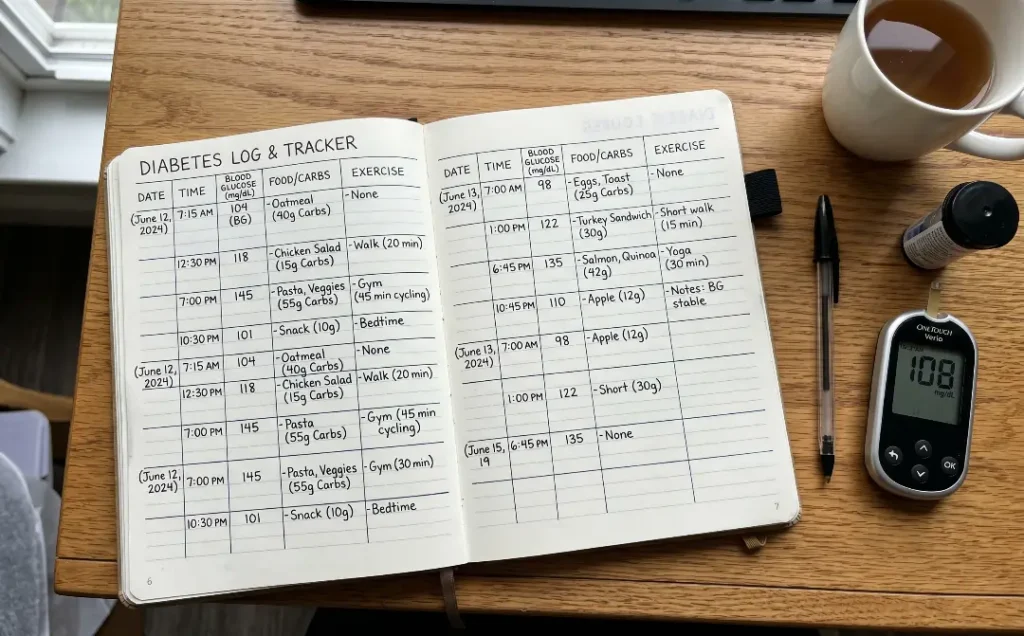
Your glucometer stores recent readings in its memory, but a detailed log that captures context alongside the numbers is far more valuable for understanding your glucose patterns. The number alone tells you where your blood sugar was at one moment in time. The log tells you why, and the why is where the actionable insights live. What did you eat? Did you exercise? Were you stressed? Were you unwell? How much sleep did you get the night before?
A good log does not have to be elaborate. A simple notebook or a notes app on your phone can work perfectly well. At minimum, record the time and result of each reading alongside brief context notes. Over a week or two, patterns emerge that are invisible when you look at individual readings. You might notice that your fasting readings are consistently higher on days when you slept poorly, or that a particular meal consistently spikes your levels more than you expected.
Many modern diabetes management apps can automatically pull readings from Bluetooth-enabled meters, which eliminates the manual logging step entirely. These apps often include food journals, medication trackers, and chart views that visualize your trends over days, weeks, and months. Reviewing these patterns before your healthcare appointments means you can have far more productive conversations about adjustments to your management plan.
Logging Essentials: Date, time, reading value, fasting or postprandial, and any relevant notes on food, activity, illness, or stress. Review weekly for emerging patterns.
Tip 11: Never Test Through Gloves or With Contaminated Equipment
This might seem obvious, but testing through thin medical or surgical gloves is an error that happens more often than you would expect, particularly in care settings where gloves are worn routinely. Even the thinnest latex or nitrile glove acts as a barrier that alters the sample, reduces the amount of blood collected, and can introduce contaminants from the glove material itself into the reading. Always remove gloves and test directly on clean skin.
The same principle applies to the cleanliness of your lancing device, meter, and test strips. Lancets should be single use only. Reusing a lancet not only increases infection risk but also creates a duller tip that requires more force to penetrate, which can introduce tissue fluid and affect sample quality. Replace your lancet after every single test, or at the very least after every testing session if multiple tests are needed close together.
Cleaning your meter regularly is also important. The test strip port and the body of the meter can accumulate dust, dried blood, and other residue over time. Follow the manufacturer’s cleaning instructions, which typically involve using a lint-free cloth slightly dampened with water or a mild cleaning solution. Never submerge your meter in water or use harsh chemical cleaners, and ensure the meter is fully dry before using it again.
Tip 12: Factor In Altitude and Humidity When Interpreting Results

Most people never think about how their physical environment affects their glucometer readings, but both altitude and humidity can introduce meaningful variation. At high altitude, the lower partial pressure of oxygen can interfere with the electrochemical reactions in some glucose meters, leading to readings that are lower than actual blood glucose levels. This is particularly relevant for people who travel to high-altitude destinations or live in mountainous regions.
Humidity affects test strips through a mechanism called moisture absorption. Even briefly exposing strips to very humid air, such as in a tropical climate or a steamy indoor environment, can alter their chemical coating and throw off results. This is one of the reasons why the strip container should be closed immediately after removing a strip, even if you are planning to test again within a few minutes.
If you are travelling to a significantly different altitude or climate, it is worth checking whether your specific meter model has documented performance variations under those conditions. The manufacturer’s documentation or customer support line can usually tell you whether your meter is validated for high-altitude or high-humidity use. In some cases, switching to a different meter model may provide better accuracy in extreme environmental conditions, which is worth knowing before a major trip rather than after you arrive.
Tip 13: Know the Limitations of Your Specific Meter Model
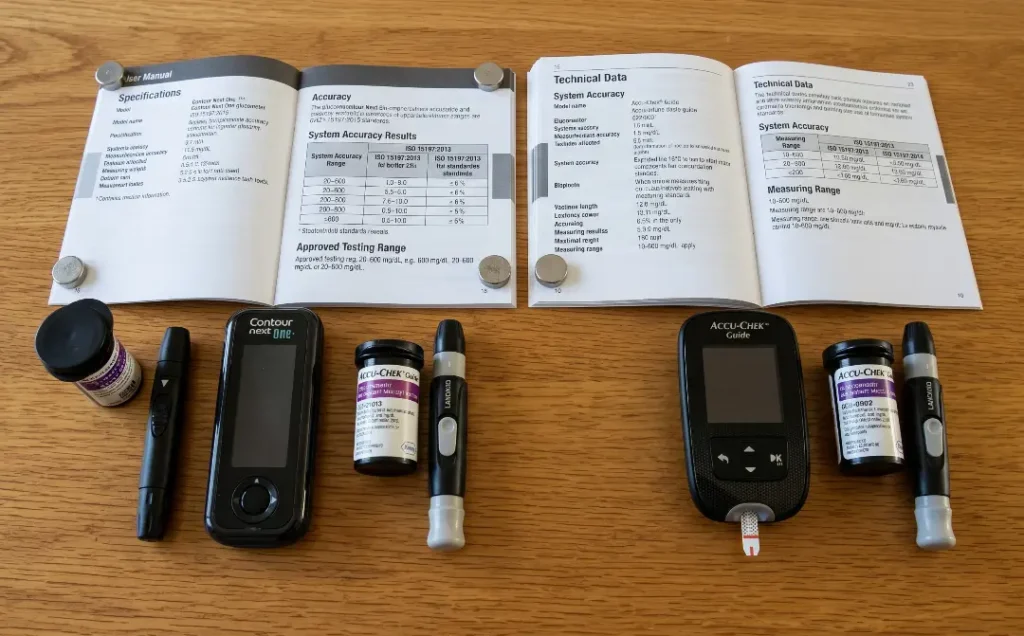
Not all glucometers are created equal, and even well-regarded meters have limitations that their users are not always aware of. The ISO standard for glucose meters allows a margin of error of plus or minus 15 percent for readings above 100 mg/dL and plus or minus 15 mg/dL for readings below 100 mg/dL. In practice, many meters perform better than this, but it is important to understand that a reading of 110 mg/dL could legitimately represent actual blood glucose anywhere from about 94 to 126 mg/dL.
Some medications and medical conditions can interfere with how certain meters calculate glucose. High doses of vitamin C, acetaminophen, and some other medications have been documented to affect readings on specific meter models. Extremely high or low hematocrit levels, which relate to the proportion of red blood cells in your blood, can also cause inaccuracies on some meters. Your healthcare provider can tell you which specific medications or conditions may affect your meter’s accuracy based on its technical specifications.
Reading your meter’s user manual thoroughly is genuinely worthwhile. Most people skip it entirely, which means they miss important information about the meter’s operating range, approved strip types, coding requirements if applicable, cleaning instructions, and the conditions under which results may not be reliable. A well-informed user gets significantly more reliable data from the same equipment than an uninformed one, simply by understanding what the device is and is not designed to handle.
ISO Standard: Home glucose meters are allowed up to a 15% margin of error. Use lab comparisons to understand how your specific meter typically performs in real-world conditions.
Tip 14: Compare Your Home Meter Results With Lab Glucose Tests
Your home glucometer is a convenient tool for daily monitoring, but it is not a clinical-grade diagnostic instrument. Periodically comparing your home readings with laboratory results is one of the best ways to understand whether your meter is performing within an acceptable range of accuracy. The ideal scenario is to test with your home meter at the same time as a blood draw for a lab glucose test, which allows for a direct side-by-side comparison.
When doing this comparison, a difference of up to 15 percent between your home reading and the lab result is considered within the acceptable performance range for consumer meters. A consistent difference greater than this suggests your meter or strips may need to be checked, that your testing technique may need adjustment, or in some cases that your meter model may simply not be performing as well as a newer model might. Documenting these comparisons over time helps you understand your meter’s typical bias, whether it consistently reads high or low relative to lab values.
Many people do this comparison only accidentally, noticing a discrepancy when they test at home just before a medical appointment. Making it intentional, perhaps once every three to six months, gives you a structured way to maintain confidence in your data. If you use a continuous glucose monitor in addition to a traditional meter, periodic fingerstick comparisons are often recommended by manufacturers to calibrate the sensor and catch any drift in its accuracy over the sensor’s wear period.
Tip 15: Account for Emotional and Physical Stress Before Interpreting Results

Stress, both emotional and physical, is one of the most powerful and often underestimated influences on blood glucose levels. When you are under stress, your body releases hormones including cortisol and adrenaline, which trigger the release of stored glucose from the liver and reduce insulin sensitivity. This is an evolutionary mechanism designed to fuel a fight-or-flight response, but in modern life it means that a stressful work presentation, a heated argument, a poor night’s sleep, or physical illness can all push your blood sugar higher regardless of what you have eaten.
If you test during or immediately after a stressful event and see a higher-than-expected reading, it is important not to automatically treat that reading as a failure of your management plan. Instead, note the context in your log and test again once you have had time to calm down or recover. A single elevated reading explained by clear contextual stress is very different from a pattern of elevated readings across different circumstances.
Physical stress from illness is particularly significant. Any infection, surgery, injury, or significant physical exertion can cause blood sugar to rise substantially and unpredictably. During illness, most diabetes guidelines recommend testing more frequently than usual and having clear guidance from your healthcare provider about when to seek additional support. Understanding this stress connection transforms you from a passive reader of numbers into an active interpreter of what those numbers mean in the context of your whole life.
Stress Hormones: Cortisol and adrenaline raise blood sugar. Always note stressful events in your testing log so you can interpret elevated readings in context rather than in isolation.
Tip 16: Understand How Hematocrit Levels Affect Your Readings
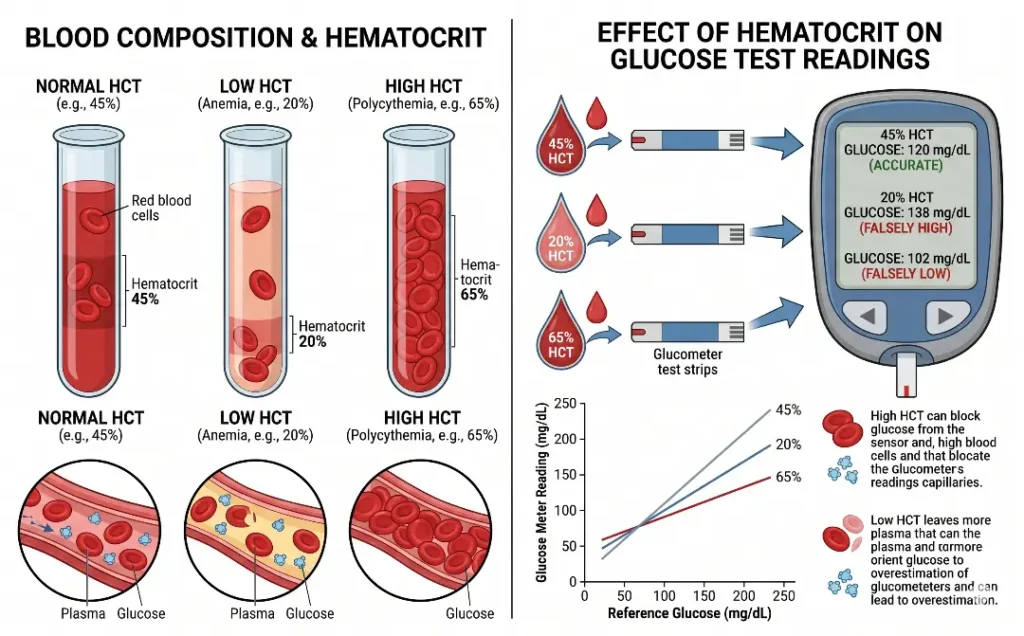
Hematocrit refers to the percentage of your blood volume that is made up of red blood cells. This number can vary considerably between individuals and can shift within the same person due to conditions like anemia, dehydration, polycythemia, or altitude acclimatization. What many glucometer users do not know is that most standard glucose meters are calibrated to work accurately within a normal hematocrit range, typically between 30 and 55 percent. Outside this range, readings can become unreliable.
If you have anemia, which means a lower than normal hematocrit, some meters will read falsely high. Conversely, if your hematocrit is higher than normal due to dehydration or polycythemia, some meters may read falsely low. This is not a problem most people encounter in daily life, but it is particularly relevant for older adults, people receiving chemotherapy, individuals with chronic kidney disease, and those who are significantly dehydrated from illness or exertion.
If you know you have a condition that affects hematocrit, ask your healthcare provider whether your specific meter model is known to be affected by hematocrit variation. Some newer meters use technology that is less susceptible to this interference. For people in high-risk groups, confirming glucose levels with a laboratory plasma glucose test during periods of known hematocrit variation is a sensible precaution that your doctor can help you incorporate into your care plan.
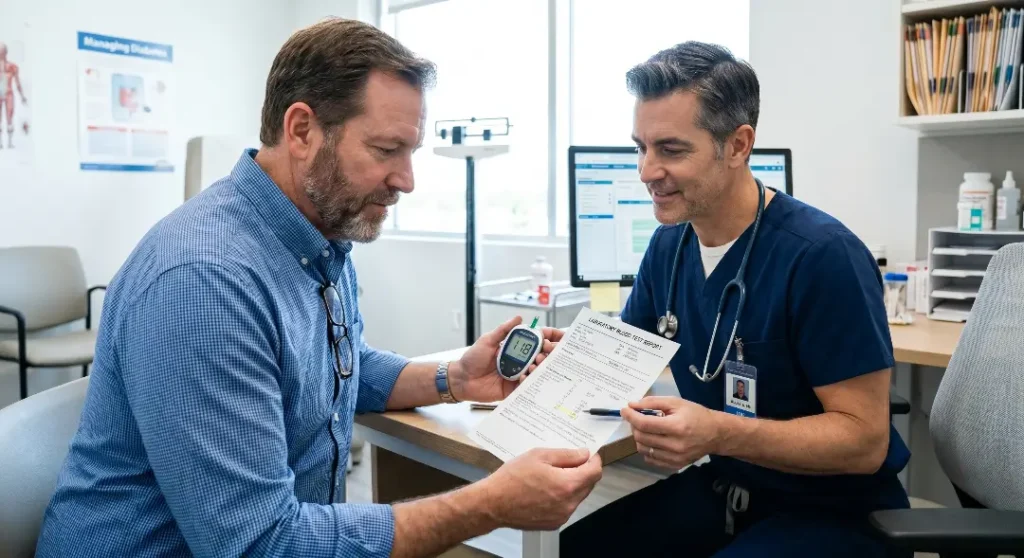
Tip 17: Check In With Your Healthcare Provider to Review Your Testing Routine
Even if you have been managing your blood sugar independently for years, periodic check-ins with your healthcare provider specifically focused on your testing routine are genuinely valuable. Diabetes management guidelines and glucometer technology both evolve regularly, and what was considered best practice three or four years ago may have been updated or improved since then. Your provider is also the right person to help you interpret long-term patterns in your data and decide whether your current testing frequency and schedule still match your treatment goals.
Bring your testing kit, your testing log, and if possible a printout or screenshot from any diabetes management apps you use to your appointments. Some meters can be downloaded directly to a computer or shared via an app to produce a printable report. This gives your provider a comprehensive picture of your monitoring habits and results that goes far beyond the snapshot view of a single in-clinic reading or a three-month HbA1c test.
Your provider can also identify technique issues that you may not be aware of, recommend equipment upgrades, adjust your testing schedule based on changes in your health or medication, and address questions about specific readings that have been confusing or worrying you. There is no substitute for professional guidance in putting all of this information together. Testing is a skill, and like any skill it benefits from periodic coaching and refinement throughout your journey managing diabetes.
Bring to Appointments: Your glucometer, testing log, strips for expiry date check, and your list of questions about any readings or patterns that have concerned you recently.
Frequently Asked Questions
How often should I replace my glucometer? Most glucometers last several years with proper care. However, if your meter consistently gives readings that are far from laboratory results, if it displays frequent error codes, or if it has been physically damaged, it may be time for a replacement. Talk to your healthcare provider if you are unsure whether your meter is still performing reliably.
Can dehydration affect my blood sugar readings? Yes, dehydration can cause falsely elevated blood glucose readings. When your blood volume decreases due to inadequate fluid intake, the concentration of glucose in your blood rises even if the total amount of glucose has not changed. Staying well hydrated is an important and often overlooked part of blood sugar management.
Is it better to test from the fingertip or an alternate site? Fingertip readings are the most accurate and responsive to rapid changes in blood glucose. Alternate site testing from the palm or forearm is acceptable for routine checks but can lag behind fingertip readings by 10 to 20 minutes during periods of rapid glucose change. Use fingertip testing whenever precise timing matters, such as after meals, during exercise, or if you feel symptoms of low blood sugar.
What should I do if my reading seems too high or too low compared to how I feel? Wash your hands and test again with a fresh strip. If the result is still unexpected, run a control solution test to verify your equipment is working correctly. If you consistently feel different from what your readings suggest, bring this to your healthcare provider’s attention as it may indicate an issue with your specific meter model or testing technique.
Do medications other than insulin affect blood sugar readings? Yes. Some medications can directly raise or lower blood glucose, while others can interfere with how the meter measures it. Common culprits that can interfere with meter accuracy include high-dose vitamin C supplements and certain pain medications on specific meter models. Always inform your healthcare provider about all medications and supplements you take so they can advise you on any potential interactions with your testing equipment.
Putting It All Together
Getting accurate blood sugar readings is not complicated, but it does require attention to a number of small details that collectively make a big difference. The 17 smart testing tips for accurate blood sugar results covered in this guide address every major source of error from the obvious ones like handwashing and strip expiry to the less obvious ones like hematocrit, altitude, and stress hormones.
The good news is that you do not need to implement all 17 tips perfectly on day one. Start with the fundamentals: clean hands, valid strips, proper storage, and consistent testing times. Then gradually layer in the more nuanced practices like control solution testing, log review, and periodic comparisons with lab results. Over time, these habits become second nature and the quality of your glucose data improves significantly.
Accurate data is the foundation of good diabetes management. Every reading you take is a data point that helps you and your healthcare team make better decisions. The more reliable those readings are, the more confidently you can act on what they tell you. Take care of your testing routine, and your testing routine will take care of you.
Medical Disclaimer: This article is for informational purposes only and does not constitute medical advice. Always consult a qualified healthcare provider for guidance specific to your individual health situation. Blood sugar management should be supervised by a licensed medical professional.